
Metered Stripe Subscription Billing
💰 Are you building a payment solution with Stripe? Consider enrolling the Stripe JavaScript Master Course.
Today we will something very ambitious - our own Software-as-a-Service (SaaS) product that bills users based on metered usage. The app is a hypothetical project management tool with a pay-as-you-go billing system based on the volume of usage (just like the Blaze plan in Firebase). A user can create multiple projects, each at a cost of $1.00 and will receive a monthly bill for the volume of projects used.
There are two new technologies (in 2018) that make a product like this possible in a single tutorial.
- Stripe Billing to make metered subscription billing easier than ever.
- Firebase Callable Functions to call HTTP endpoints without complex authentication middleware.
In addition, we will also take advantage of Firestore and Stripe Elements to quickly build a full stack subscription payment solution.
Getting Started Prerequisites
You should have the following
- Angular v6 App with AngularFire2 installed.
- A Stripe account
Inside the angular app, you should generate the following resources.
ng g service auth
ng g component payment-form
Functions Initialization
You can set functions inside your Firebase project by running:
firebase init functions
# Make sure to select TypeScript

cd functions
npm install stripe
npm install -D @types/stripe
Then go to the stripe dashboard and grab your secret key. We will set it as an environment variable in Firebase to prevent it from being exposed publicly.
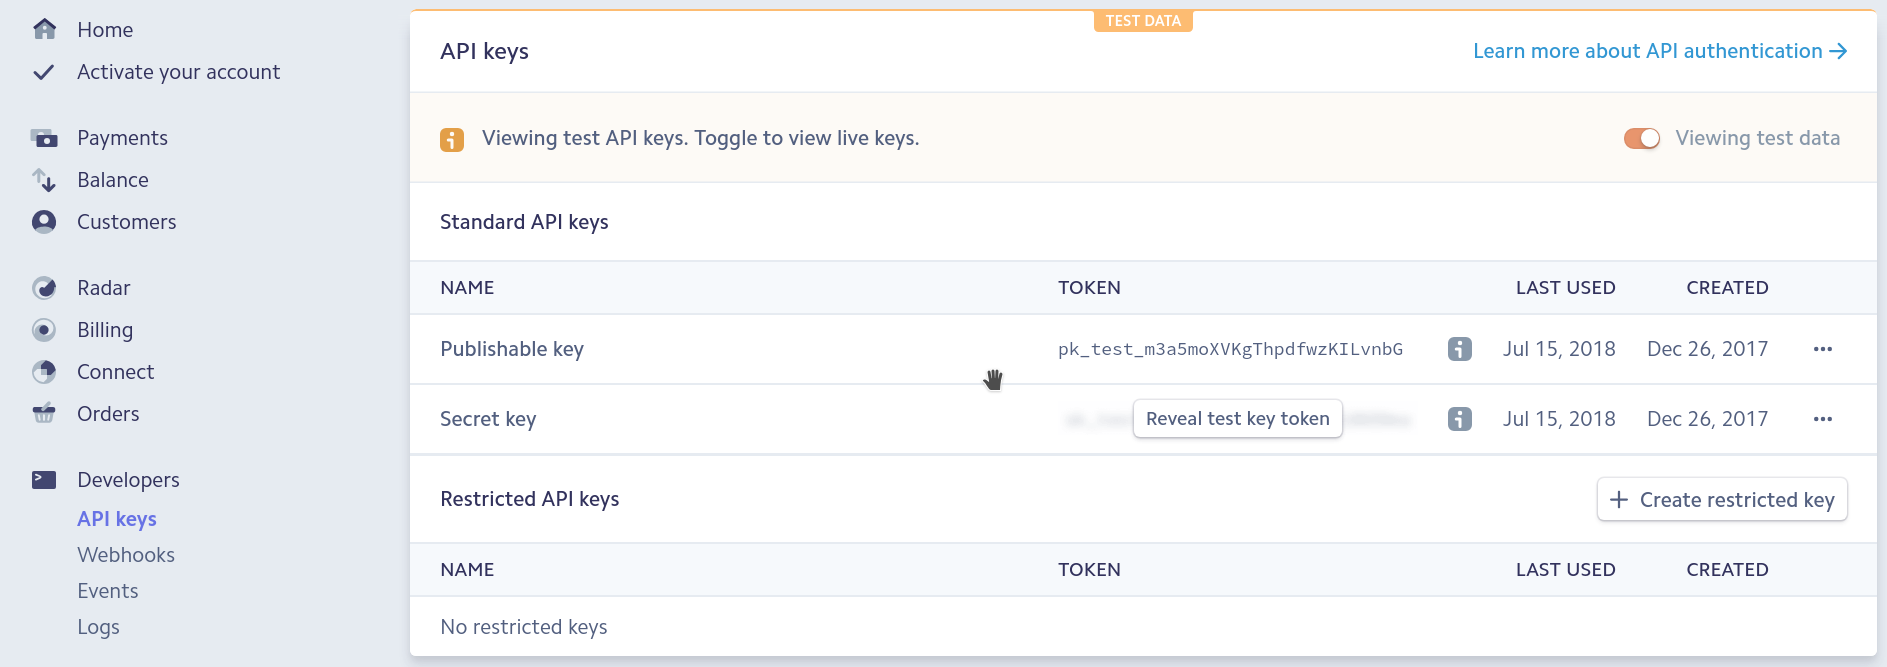
You can set it as an environment variable by running:
firebase functions:config:set stripe.secret="sk_test_YOUR_KEY"
In total, we will write three cloud functions, but they can share the following global variables in functions/src/index.ts.
import * as functions from 'firebase-functions';
import * as admin from 'firebase-admin';
admin.initializeApp();
const db = admin.firestore();

import * as Stripe from 'stripe';
const stripe = new Stripe(functions.config().stripe.secret);

// Cloud Functions will go here...
Add a Metered Plan in Stripe
Before writing the difficult code, let’s define a new product and metered billing plan in Stripe. Go to Billing => Products and setup a plan with metered usage.
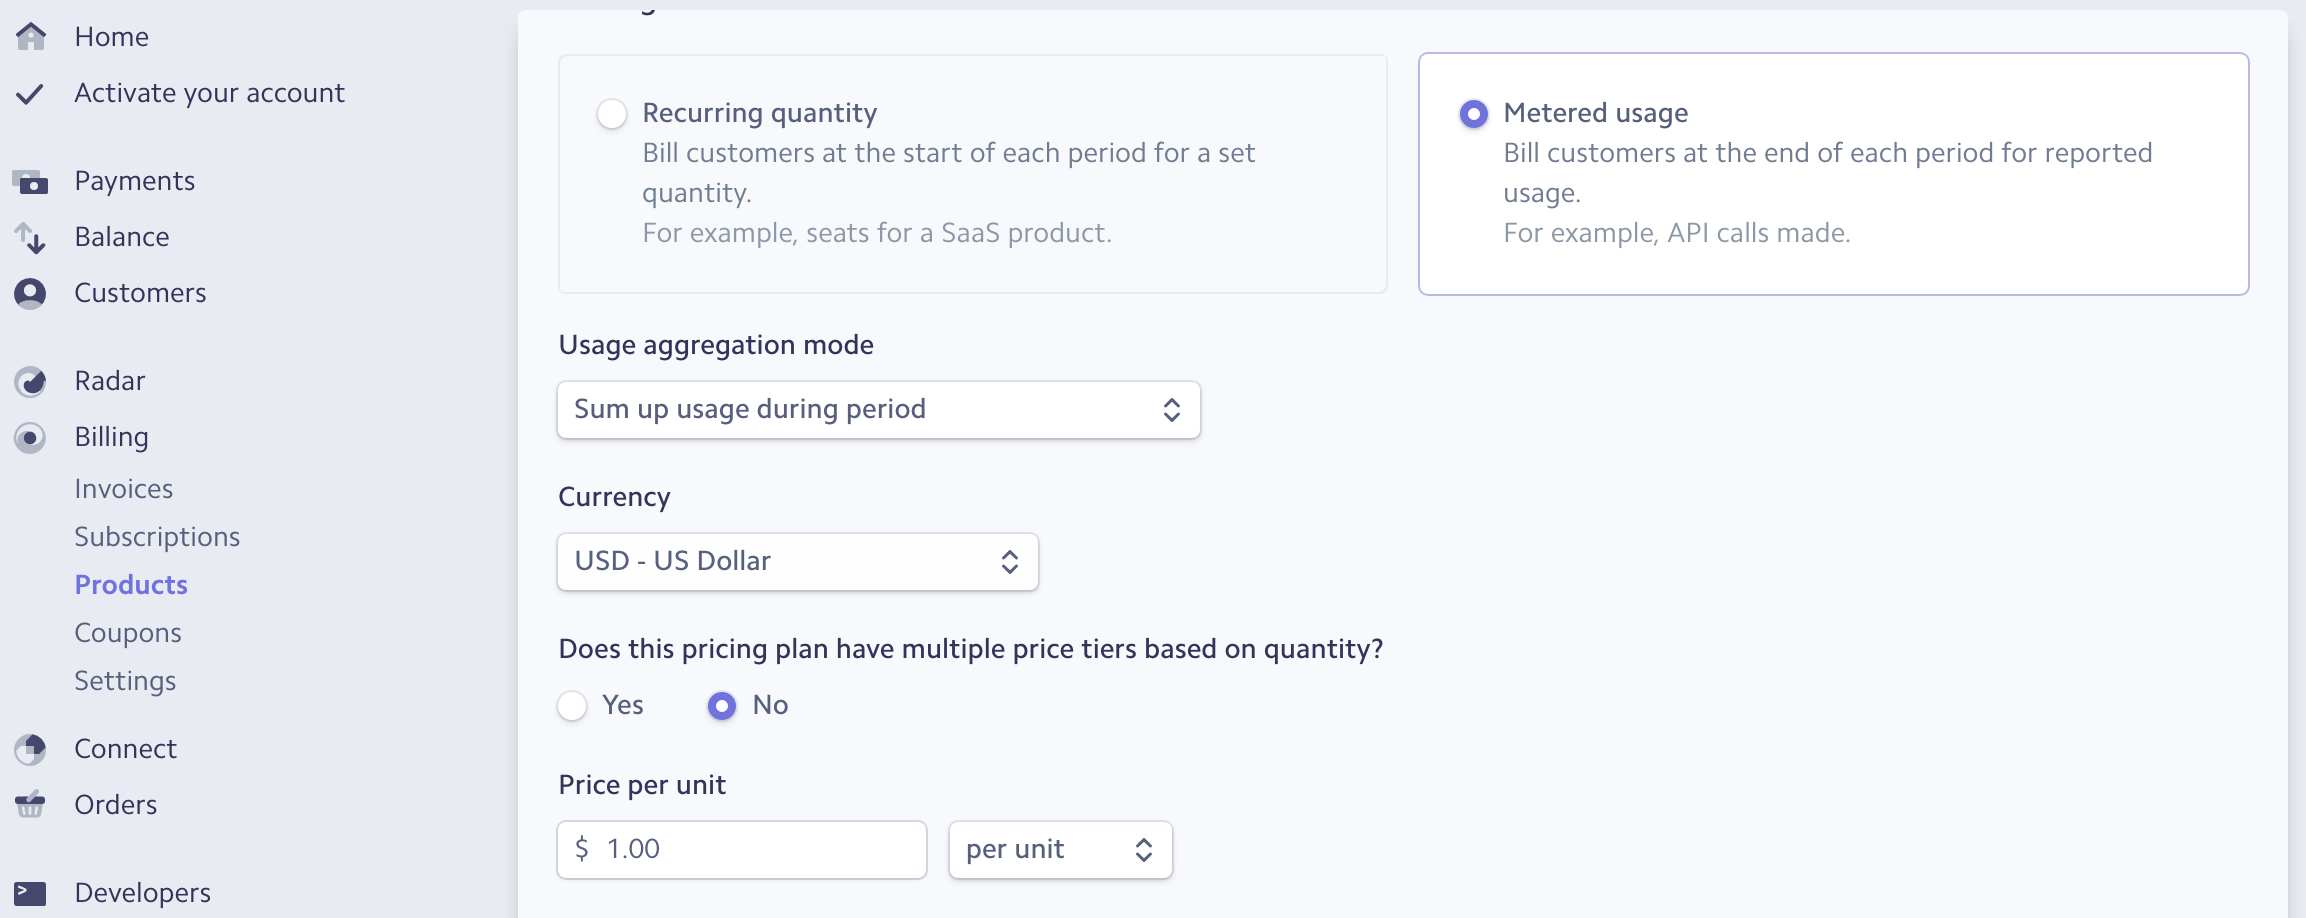
Billing plan
Make a note of the plan ID - it should look like plan_xyz....
Setup User Auth
The first milestone is to get a Firebase user signed up with a Stripe customer ID.
This tutorial is compatible with all Firebase auth methods, but we'll be using anonymous auth to keep the setup concise. I also recommend following [Episode 55 for Google OAuth](/lessons/google-user-auth-with-firestore-custom-data/) for a more in-depth look at Firebase auth.
Here’s what our user model looks like when modeled in TS.
interface User {
  // Firebase UID
  uid: string;

  // Stripe customer ID
  stripeId?: string;

  // Stripe Subscription data
  subscriptionId?: string;
  status?: string;
  currentUsage?: number;
  itemId?: string
}
Auth Service
The auth service is responsible for logging a user into our Firebase app and maintains an Observable of the user data in Firestore.
src/app/auth.service
import { Injectable } from '@angular/core';
import { AngularFireAuth } from 'angularfire2/auth';
import { AngularFirestore } from 'angularfire2/firestore';

import { Observable, of } from 'rxjs';
import { switchMap } from 'rxjs/operators';


@Injectable({
  providedIn: 'root'
})
export class AuthService {
  user: Observable<User>;
  constructor(private afAuth: AngularFireAuth, private afs: AngularFirestore) {
    this.user = this.afAuth.authState.pipe(
      switchMap(user => {
        if (user) {
          return this.afs.doc<User>(`users/${user.uid}`).valueChanges();
        } else {
          return of(null);
        }
      })
    );
  }


  async anonymousLogin() {
    const credential = await this.afAuth.signInAnonymously();
    return await this.updateUserData(credential.user);
  }

  private updateUserData(user: User) {
    return this.afs
      .doc(`users/${user.uid}`)
      .set({ uid: user.uid }, { merge: true });
  }
}
Cloud Function 1: Create a Stripe Customer
The first cloud function is responsible for creating the Stripe customer. If you anticipate payments from your a users, it is helpful to setup the Stripe customer ID as soon as they signup. Conveniently, we can handle this in the background with a Firebase auth onCreate trigger.
The following function (1) listens for a new user signup, (2) creates a stripe customer, and (3) sets the returned customer ID on that user’s document in Firestore.
functions/src/index.ts
export const createStripeCustomer = functions.auth
  .user()
  .onCreate(async (userRecord, context) => {
    const firebaseUID = userRecord.uid;

    const customer = await stripe.customers.create({
      metadata: { firebaseUID }
    });

    return db.doc(`users/${firebaseUID}`).update({
      stripeId: customer.id
    });
  });
Collect a Payment Source
The second major milestone is to collect a valid payment source for the user and subscribe them to the billing plan.
Add Stripe.js to index.html
Add Stripe.js to the head of the HTML index in Angular.
<head>
    <!-- omitted -->
    <script src="https://js.stripe.com/v3/"></script>
</head>
Payment Form with Stripe Elements
Stripe Elements is able to mount a credit card form with complex client-side validation rules out of the box. Without elements, we would need an entire tutorial dedicated to building this form. But thankfully, we get the job done with just a few lines of code. The component needs to register Stripe with the publishable key, then give it a DOM element to attach the card form to.
The other important line of code is httpsCallable('startSubscription') - it is making an HTTP call to a cloud function (which we create in the next step) and it will automatically include information about the user. No need to set and decode authorization headers, yay!
payment-form.component.ts
import { Component, AfterViewInit, ViewChild, ElementRef } from '@angular/core';
import { AngularFireFunctions } from 'angularfire2/functions';

declare var Stripe: any;

const stripe = Stripe('pk_test_xyz...');
const elements = stripe.elements();

const card = elements.create('card');

@Component(...)
export class PaymentFormComponent implements AfterViewInit {

  // DOM Element
  @ViewChild('cardForm') cardForm: ElementRef;

  constructor(private fun: AngularFireFunctions) {}

  // Mount the card form
  ngAfterViewInit() {
    card.mount(this.cardForm.nativeElement);
  }

  // Form submission Event Handler
  async handleForm(e) {
    e.preventDefault();
    const { token, error } = await stripe.createToken(card);
    const res = await this.fun
      .httpsCallable('startSubscription')({ source: token.id })
      .toPromise();
  }
}
The HTML just needs to bind the handler to the form’s submit event and mark a div with #cardForm so it can be picked up by the TypeScript code.
<form action="/charge" method="post" (submit)="handleForm($event)" >
    Signup for just $1.00 per project created

        <div #cardForm>
            <!-- A Stripe Element will be inserted here. -->
        </div>

    <button type="submit">Submit Payment</button>
</form>
Cloud Function 2: HTTP Callable to Start a Subscription
Now that we have collected a payment source, we need to attach it to a customer and subscribe them to a plan. Let’s break this down in steps.
- Get the user’s document from Firestore
- Add the payment source to the Stripe customer
- Subscribe the user to the billing plan
- Update the Firestore document with the plan details
functions/src/index.ts
export const startSubscription = functions.https.onCall(
  async (data, context) => {

    // 1. Get user data
    const userId = context.auth.uid;
    const userDoc = await db.doc(`users/${userId}`).get();
    const user = userDoc.data();

    // 2. Attach the card to the user
    const source = await stripe.customers.createSource(user.stripeId, {
      source: data.source
    });

    // 3. Subscribe the user to the plan you created in stripe
    const sub = await stripe.subscriptions.create({
      customer: user.stripeId,
      items: [{ plan: 'plan_xyz...' }]
    });

    // 4. Update user document
    return db.doc(`users/${userId}`).update({
      status: sub.status,
      currentUsage: 0,
      subscriptionId: sub.id,
      itemId: sub.items.data[0].id
    });
  }
);
Report Metered Usage
Now that our user has subscribed, we need to bill them for something. You achieve this in Stripe by sending metered usage reports, which happens to be a perfect use case for cloud functions.
In this case, users will be billed $1.00 per month for every project document they create.
If you have a high volume of events to bill, you can send usage reports periodically with the volume. For example, you might have a nightly cron job that sums up usage for the day.
Cloud Function 3: Updating Metered Plan Usage
The final step is to create a cloud function that updates Stripe with a usage report whenever data is created in Firestore.
Notice how we're using an optional `idempotency_key` to ensure that multiple function innovations do not overcharge the user. This is considered a best practice in Stripe, especially in a serverless environment.
export const updateUsage = functions.firestore
  .document('projects/{projectId}')
  .onCreate(async snap => {
    const userRef = db.doc(`users/${snap.data().userId}`);

    const userDoc = await userRef.get();
    const user = userDoc.data();

    await stripe.usageRecords.create(
      user.itemId,
      {
        quantity: 1,
        timestamp: (Date.parse(snap.createTime) / 1000) | 0,
        action: 'increment'
      },
      {
        idempotency_key: snap.id
      }
    );

    return userRef.update({ currentUsage: user.currentUsage + 1 });
  });
At this point, you should be able to deploy your backend code and start testing it out.
firebase deploy --only functions
Additional Considerations
Payments are a business critical feature there are several other considerations we have not covered, such as plan cancellation, recurring payment webhooks, and more. If you’re serious about building a payment system, checkout Full Stack Stripe Payments, which takes you through a full serverless payment solution from start to finish.