
Build an Angular Library With NgPackagr
In this lesson, I will show you how to build an Angular Library from scratch using NgPackagr. My main motivation for this article is that Google Analytics recently changed their main API to gtag.js, but solid Angular libraries were lacking, so I decided to build one from scratch. NgPackagr made the bundling process very easy.
Angular packages are standardized by the Angular Package Format, but generating this output manually is difficult. NgPackager will do all the stuff you don’t want to deal with, like generating the bundles (FESM2015, FESM5, and UMD), creating your types, and ensuring that the end result is AOT compatible.
Full source code [Angular NgPackager Tutorial](https://github.com/AngularFirebase/103-angular-ngpackagr-tutorial).
IMPORTANT Update for Angular v6.0
Angular CLI v6.0 introduced a new command that will save much of the manual configuration required in the this lesson.
# Generate a library
ng generate library awesome

# Build it
np run awesome:build

# Install it in your app
npm install dist/awesome
While the code in the following steps is still valid, I highly recommend using the CLI to eliminate the manual creation of files.
Step 1 - Build an Angular CLI Project
Let’s generate an app and give it a module and component. The app itself is not part of the library, but will be used for integration testing.
ng new awesomePackage --routing
cd awesomePackage
Now lets create a feature module and add some resources to it.
ng g module toast

ng g service toast/toast -m toast
ng g component toast/toast-message --export
I’m not going to cover how to build the actual app, but it’s just simple toast notification system. It includes a service that controls he message content/visibility and component that shows the actual message to the end user.
Step 2 - Setup your Lib
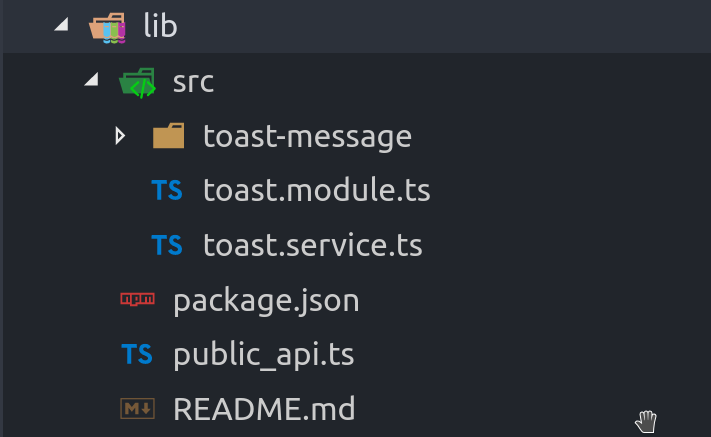
Create a folder in the root of your project named lib (or whatever you want) - this is where the source code for our library will exist.
Inside this the lib folder create the following elements.
- src/ source code
- package.json package definition
- public_api.ts to export your public Angular modules
- README.md so people know how to use your library
Then move the files from your toast feature module to the src folder in lib.
Creating an Angular Module for Root
The library’s module works mostly like it does in Angular, but the main difference is the way services are provided. In many cases, developers may need to pass configuration options to a library. This can be accomplished by defining a forRoot method, which returns an object typed to ModuleWithProviders interface.
import { NgModule, ModuleWithProviders } from '@angular/core';
import { CommonModule } from '@angular/common';
import { ToastService } from './toast.service';
import { ToastMessageComponent } from './toast-message/toast-message.component';

@NgModule({
  imports: [ CommonModule ],
  declarations: [ToastMessageComponent],
  exports: [ToastMessageComponent]
})
export class ToastModule {
  public static forRoot(config): ModuleWithProviders {
    return {
      ngModule: ToastModule,
      providers: [
        ToastService,
        { provide: 'config', useValue: config }
      ]
    };
  }
}
The end-user of the lib would use this module in their app like so:
ToastModule.forRoot({ apiKey: 'shhhhh' })
Injecting Configuration Options
If we need to use the data passed to the module via forRoot, we can do so by using the @Inject decorator in the constructor.
@Injectable()
export class ToastService {

  constructor( @Inject('config') private config ) { }

}
Step 3 - Configure for NgPackagr
NgPackagr makes a few reasonable requirements of us to perform its magic.
Install
Install NgPackagr.
npm install ng-packagr --save-dev
Public API
In lib/public_api.ts export the interfaces that the developer should be able to access.
export * from './src/toast-message/toast-message.component';
export * from './src/toast.module';
export * from './src/toast.service';
lib/package.json
In the lib/package.json we will define our library’s NPM details. Make sure the name of the package is available on NPM if your project is open source.
The special section is ngPackage, which is used by NgPackagr to locate the public API file for your project.
Your package should not have any dependencies, only peerDependencies and devDependencies
{
    "name": "super-toasty",
    "version": "0.0.1",
    "author": "Jeff Delaney <hello@angularfirebase.com>",
    "license": "MIT",
    "peerDependencies": {
      "@angular/core": ">=5.0.0",
      "@angular/common": ">=5.0.0"
    },
    "ngPackage": {
      "$schema": "./node_modules/ng-packagr/ng-package.schema.json",
      "lib": {
        "entryFile": "public_api.ts"
      },
      "dest": "dist"
    }
  }
NPM Script
In the package.json (in the root of the project, not lib) add a build script.
  "scripts": {
    // ...
    "build:lib": "ng-packagr -p lib/package.json"
  }
Now run npm run build:lib and you should see output like this:

Step 4 - Do some Integration Testing
Now it’s time to do some integration testing. Install the local package and serve the Angular app.
npm i lib/dist
ng serve
Then import the library in the app module.
import { ToastModule } from 'super-toasty';

@NgModule({
  imports: [
    ToastModule.forRoot({ brand: 'fireship.io' })
  ]
})
Because we provided a service, we can inject it into our components.
import { ToastService } from 'super-toasty';

@Component({...})
export class AppComponent {

  constructor(toast: ToastService) {
    toast.show()
  }
}
And because we exported a component, we can use it in our templates.
<toast-message></toast-message>
Step 5 - Publish to NPM
Publishing to NPM is super easy. First, make sure you’re logged into your account, then run the publish command pointing to lib/dist.
npm whoami
npm publish lib/dist
Congrats! The world is free to use for Angular Package by running:
npm install your-awesome-package
Best Practices when Writing Angular Libraries
On a final note, let’s talk about some best practices when building angular libraries.
Don’t touch the DOM
If your library touches he DOM directly, such as document.getElementById('foo'), it will break other developer’s apps when they use Angular with server or web worker platforms. If you must do this, wrap your code in a try/catch block.
Strong Type
Your public API should be strong-typed. Developers like Angular because of the awesome tooling provided by TypeScript. Try to make end-users of your package as happy as possible by leveraging types.
Bad
someMethod(options: any) { ... }
Good
export interface Options {
  foo: string;
  bar: boolean;
}
someMethod(options: Options) { ... }
Write Documentation
Duh!
Write Unit and Integration Tests
As your library grows in complexity it becomes easy to introduce bugs and regressions. Write some tests an implement use continuous integration to ensure every commit meets your spec. Tests will also make it easier for other developers to contribute to the codebase without breaking everything.